

The First World War Mod: Statecraft
In previous posts, I’ve talked about my plan to create a World War 1 overhaul for the (typically World War 2 based) strategy game, Hearts of Iron IV. This is a big task, especially in the map-building department, which is why I created a bunch of python scripts to speed up my workflow. With those scripts ready to use, I’ve been setting up the most essential regions of the map (once they’re in place, I can start simultaneously building focus trees and other content).
I’ve already created France and Germany (an ideal microcosm of the whole war, allowing me to run balancing tests for the Western Front). The next logical step, in my opinion, would be the war’s crucible: the Balkans.
Maps, Maps, Maps
One thing I learned the hard way when starting this mod is that your source maps need to be correct, as well as accurately implemented into your image editor (I use photoshop). In particular, the most essential type of image HoI uses to define its landscape is, arguably, the heightmap. This is the map that tells HoI how high terrain should be.

Sea level, for example, is somewhere around 94 greyscale value (out of 255), so you need to get the coastline of your source map sitting at that level. Then there’s the fact that the Himalayas are very, very tall - so much so that your other important hills and mountain ranges like the Alps and Carpathians will only look like moderate bumps. Both of these problems can be solved with clever use of Photoshop’s levels and curves adjustment tool.
I could go into a lot of detail here: getting the basis of my map correct took weeks of work - defining islands properly, making sure all the important straits actually have water running through them, deciding where Norway’s rivers become fjords. I didn’t quite anticipate how much effort the basic map would require.
In a previous post, I mentioned that my map also has a very odd projection (more of a warp, really) to enlarge Europe and get the Suez canal in as well. This is all done with photoshop’s Smart Object feature, in which an image can be transformed in a certain way (such as warping), while containing several layers that can be enabled and disabled. The result is that each layer (a source mercator map, in my case) has the same warp applied:

I bring this up in case there are any modders out there struggling with the same problem. The technique has come in extremely handy (critical, really), as I’ll demonstrate.
Some may be wondering, why am I not simply warping the vanilla Hearts of Iron IV maps to get my result? The vanilla maps feature Europe in a Mercator projection, which I could warp into the shape I want and be done with things like terrain and tree cover.
In fact, I did start by doing that. And it works fine for superficial cases, such as map coloration or tree cover. But doing so really hampered my progress due to the fact that, as I mentioned, the heightmap defines almost everything else about your terrain, and HoI IV’s heightmap is obviously not detailed enough for me to work with (being from a larger map). For this reason, I do reccomend that map modders make sure they get their heightmap correct first.
From Agram to Zalău
To demonstrate the way I build my map, I’m going to walk through the entire process of how I go about building a particular region. At the time of writing, completing the French/German region has given me a chance to experiment with my method a little, and at this stage my current workflow goes like this:
Isolate a particular area and create a warp-guide.
Define rivers.
Define (natural) terrain.
Define states.
Define (manmade) terrain.
Define tiles.
Use my python scripts to auto-fill the tiles.
Cleanup.
With France and Germany already in the game, my next step of map creation is to introduce the Balkans (where the war began), as well as the Western provinces of Russia. Once these four regions are established, I’ll be able to start creating and testing content on a larger scale, as I’ll have four of the main players of the war available (two Entente, and two Central Powers).
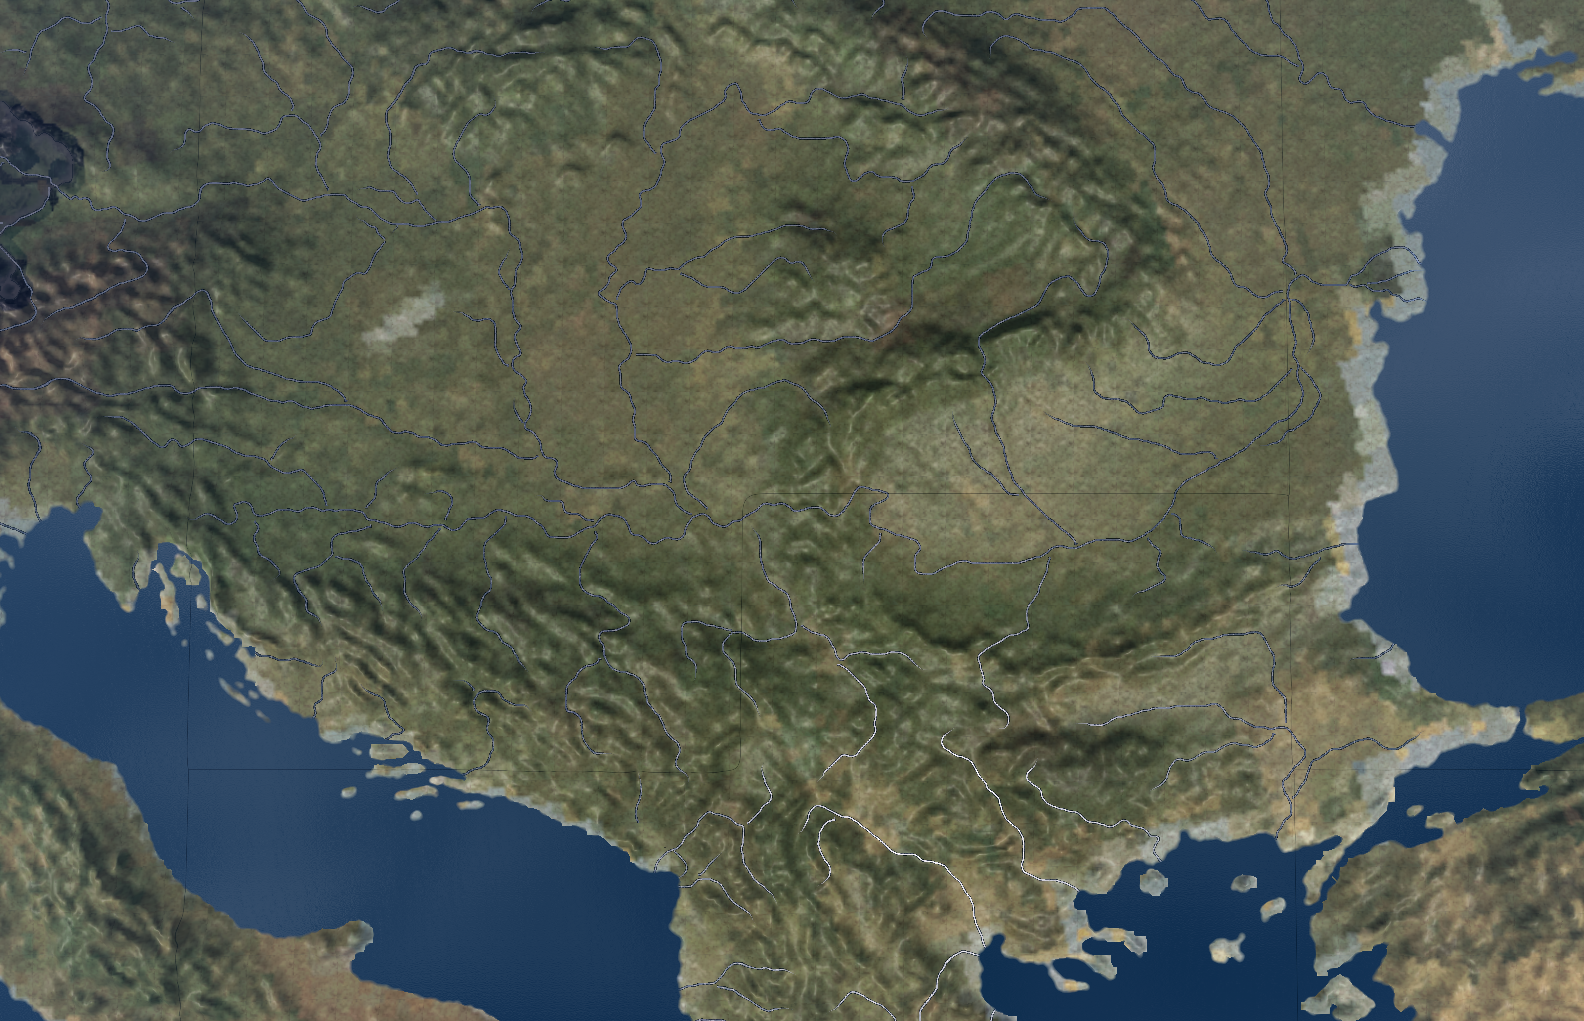
So let’s walk through how I build the Balkans. This area will include all of Austria-Hungary, as well as all land up to the Bosphorus straits. Essentially, any areas of Eastern Europe not already owned by Russia and Germany. This entire region is of particular importance for the play-making of the mod - the ‘Balkan powderkeg’ was a politically troubled area in the years leading up to the war, and will serve as a volatile playground with lots of potential to start conflicts. It also needs to host the two major conflicts that preceeded the Great War itself; the 1st and 2nd Balkan Wars.
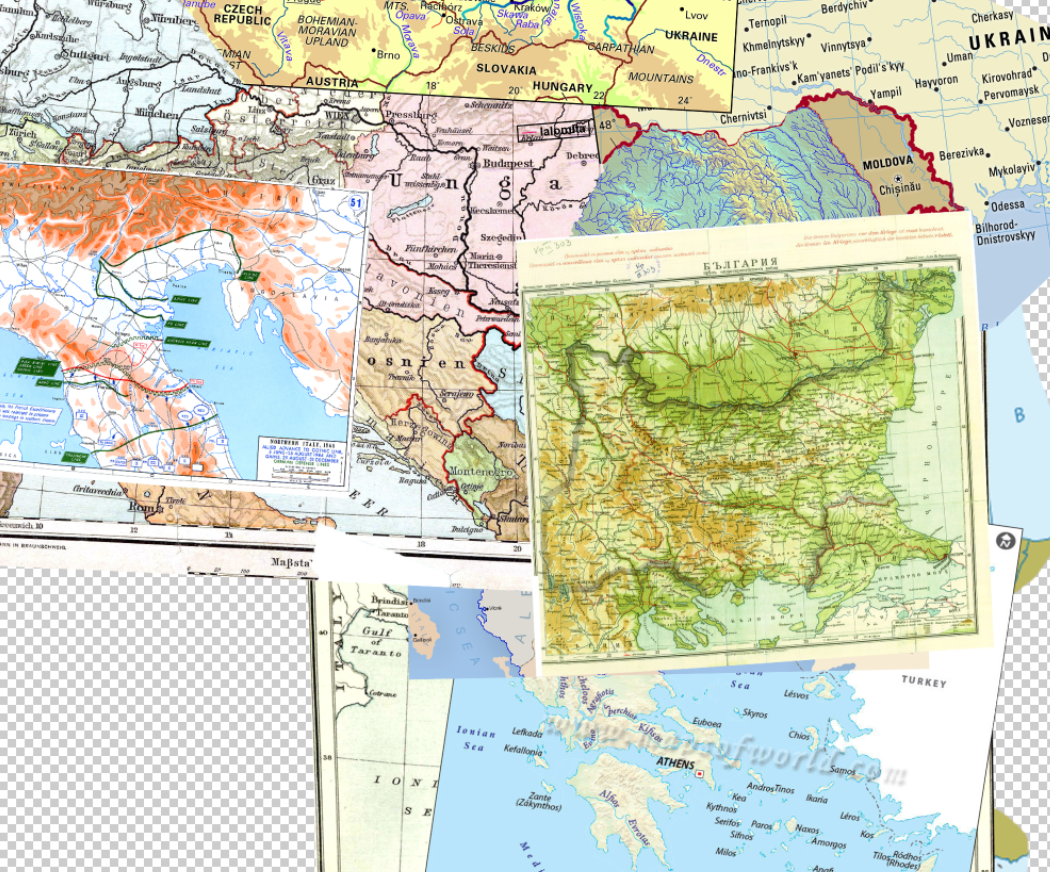
To begin, I set up a warp guide.

As mentioned earlier, this is a map that I’ve turned into a smart object and warped to fit my mod’s particular projection. I can go into this guide, and start placing other maps (to help with rivers, terrain, rail networks, borders …). It’s important that this smart object has a high resolution (making it easy for me to read map labels), and relatively accurate borders. The more accurate your base map, the easier things will be in the following steps.
Hydrography
The first step is to define rivers. Luckily, the Balkans is itself dominated by the basin of just one river in particular - the enormous Danube - with a handful of smaller systems draining through Greece, Bulgaria, and elsewhere.
Finding source maps to help draw rivers is always a pain - good maps that show river names (which makes research easier), river sizes, and most importantly an accurate plot of the river’s course, are surprisingly hard to find. I usually have to rely on dozens of maps for cross-referencing, and for more detailed renditions of important tributaries. Here’s how my guide looked after I’d finished working:
My workflow is to find the best map I can for a river system (or, with something as huge as the Danube, a section of a river system) and start marking out the tributaries I want in blue. There are streams and brooks of all sizes all across Europe, but obviously I only want to represent the ones large enough to act as significant military barriers. I also need to worry about river density: detail and accuracy are all well and good, but more rivers generally means more map tiles, which means slower pathfinding. My usual criteria for deciding if I should include a river or not is that it should be above 30 meters in width, for more than a few tiles on the map. To gauge this, I often keep a tab of Google Maps open, as well as the Wikipedia list of European rivers.
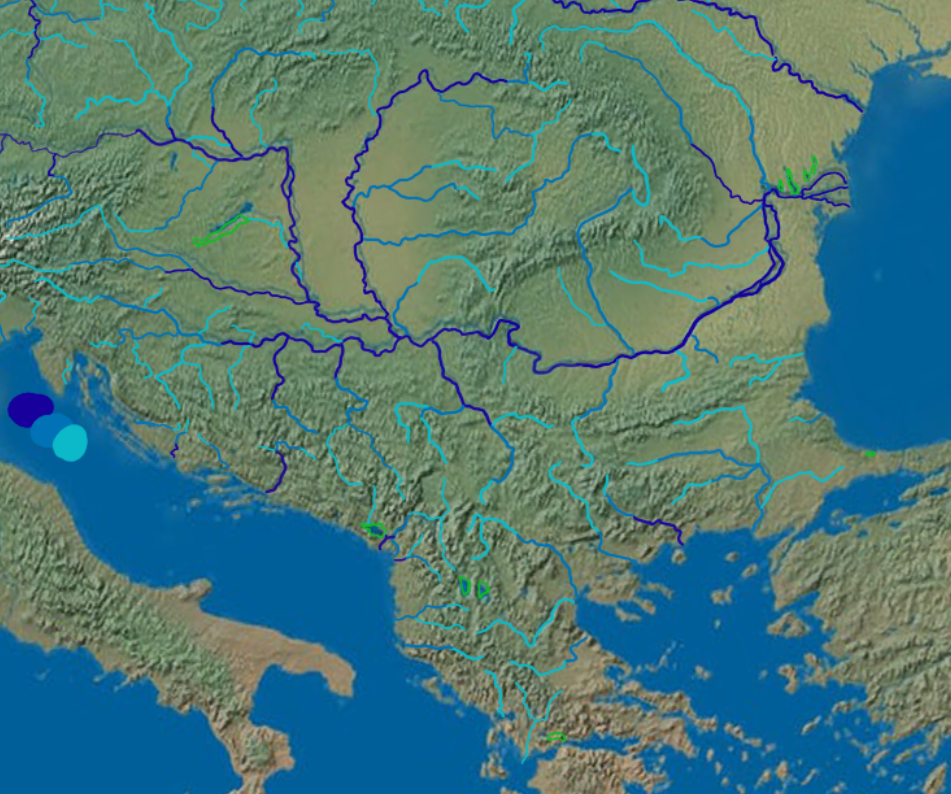
Here’s how my markings turned out:

Dark blue represents rivers of greater than 100 meters in width, while mid blue is 50-100m and light blue is < 50m. Obviously there’s plenty of guesswork here, as some rivers vary their length a lot over their courses. Lakes which I decide are large enough to include are marked in green.
Now I can save the smart object, and have it overlaid on my actual map.
Confound It We Forgot The Balkans
As I mentioned, we started with rivers because they so often align with political borders (be they international or internal). Borders in HoI IV define states, which are the basic political and infrastructure unit, able to contain buildings, be occupied and annexed, etc. States in vanilla HoI IV occur at a pretty large scale: areas as big as the West Midlands in England or Weser-Emms in Germany are just a single state in HoI. Obviously, my mod can afford to be more detailed, since it focuses on Europe.
Importantly, states define what shape a country can take in HoI IV. This may sound benign, but remember that the ultimate goal of a HoI IV player is to win a war and expand their country: peace deals, even though the usually only happen at the end of the game, are a really important opportunity for a player to carve out Greater Portugal or something like that. States are also traded using focus trees and events (which is why, in vanilla, the Sudetenland is a Czech state, even though no such administrative unit existed [to my knowledge] in Czechoslovakia. Germany needs to annex this land, so the land is its own state).
In short, the way I define my states needs to support the various geopolitical layouts before, during, and after the war. I’ve already done this with the French and German regions, for example, specifically demarking German states that represent the Potsdam Agreement borders, or the pre-Empire Kingdoms/Duchies, should Germany’s conquerer wish to reduce the state to its pre-1871 situation.
A fair amount of research is required. It’s important that I get this correct on the first try, since adjusting terrain tiles in HoI can be very difficult once provinces IDs have been defined. A first, and obvious, pitstop for me was the dissolution of Austria-Hungary, which saw quite a complex partition of both Austrian and Hungarian lands: players should, obviously, be able to recreate the Treaties of Saint-Germain and Trianon.

There are less obvious concerns with Austria-Hungary, too. First, there were a few lesser-known successor states that sprung up during the final days of the empire: the West Ukrainian People’s Republic, neighboring Lemko Republic, the Hungarian Soviet Republic, and even the tiny Regency of Carnaro established by the rogue general Gabrielle d’Annuzio). Second, there were plans for a federal Austro-Hungarian Empire, championed in this period by none other than Franz Ferdinand: devolving the empire into this coalition of states was Ferdinand’s plan to ensure his cominion’s future, and was directly opposed by the Serbian Black Hand network of assassins (who thought it’d diminish their chances of gaining control of Bosnia, since such an action would placate the Serbian minority in Austria-Hungary). This is all dramatic history which can definitely be represented in the mod’s focus trees, so the state design needs to support that, too.

Then there are the Hungarian portions of Slovakia, initially skirmished over in the conflict following World War 1, the territory given to Austria from Hungary (Burgenland), the unfulfilled Italian claims in Dalmatia which contributed to the rise of Italian nationalism, and this is just Austria-Hungary.
As I may have mentioned elsewhere, the mod is drawn up to start in 1911, just before the Adagir Crisis and the Italo-Turkish war. The principle pre-war conflicts in this part of the map, and the prelude to the Great War, would be the 1st and 2nd Balkan wars which, in a very short time, saw rapid-fire annexations traded between the declining Ottoman Empire, Blugaria, and the rest of the emerging Balkan states.
When I lay out all of these treaty guides, and go over the important borders, I end up with a guide that looks like this:

It’s more than a little disorganised, but hopefully you can see that I’ve tried to color-code the products of various trieaties and exchanges
Red borders represent the end-result of the Austro-Hungarian empire’s dissolution.
Black represents borders at 1914, with a few exceptions where I got distracted/sloppy.
A few purple borders represent some important boundaries used by the post-war Yugoslavia.
Some blue borders in Austria-Hungary represent federal Austria-Hungary subdivisions where these are not already roughly aligned with state or international borders.
All across the southerm Balkans, gold and crimson lines portray the complex dealings of the 1st and 2nd Balkan wars, plus some territorial changes following 1918.
The green borders represent otherwise unimportant administrative divisions, which didn’t play a historic role but could, if the player so pleases. Drawing these requires me to dig through a huge amount of administrative maps of various Balkan states, identifying historic regions of an appropriate size, where possible. It’s messy work, and I’m sure I’ve made some silly mistakes that will make Hungarians or Romanians eye-roll. But it’s also very fun and informative.
The result:

Terrain Types
Next, terrain. This is probably the single most time-consuming step, especially for large and geographically diverse areas like the Balkans.
HoI IV features a range of terrain types which define offensive/defensive power, air-support effectiveness, and movement speed. The former is particularly important: players can use forests, hills, mountains, and rivers as natural defensive lines. Opting to give up ground for the sake of defensive integrity, or planning to take land up to a natural barrier to secure a front, is a major component in the strategic fabric of the game. In the First World War, there were instances of this at all times, across all theaters (the Russian Great Retreat, the Austrian Tyrol retreat …). Terrain gives the bulk of character to the map, and good terrain should both portray the historic landscapes of the war (key mountain passes, important highlands, forests at which major battles took place …) and give players a lot to work with when planning their offensives.
The first type of terrain I work on is hills and mountains (which the Balkans is covered in). The main problem here is that the definition between the two is entirely arbitrary: a mountain is just a hill that’s steep or rocky enough to be called otherwise, and a hill is just an uneven plain. It’s easy to look at obvious ranges, clearly distinct from their surroudnings, and mark them as hills. But what about more gradual, widespread physical features (Bavaria and Bohemia are very tricky for this: both are just lumpy enough to be arguably dominated by plains or hills, and chosing between the two can force me into a lot of back-and-forth/looking at historic battles to see what strategists at the time thought).
For areas that were the sits of important front I tend to do a little research to try and find out which physical features dominated a given military operation. Again, I make heavy use of map-warping in photoshop: here’s a map of the Caporetto offensive on the Italian-Austrian border, with outlines of the plans I drew up after reading about the battles of Isonzo.

The brown outlines are the edges of hill ranges, the grey is mountains, and the light-green represents plains within otherwise rough terrain (i.e. high plains and plateaus). On the left, we have the Asiago plateau, which was hugely important in the Austrian-Italian alpine skirmishes. On the right, you can see the Karst and Banjšice plateaus of Slovenia, which were Italian Marshall Carorna’s objectives for most Isonzo assaults. In game, reaching these regions gives the player a chance to take a lot of land and open a route into the enemy’s territory, since plains have a lower defensive value than hills and mountains. It’s worth noting that, although I do have plenty of topographic maps to help me, the existence of plateaus like these (especially tiny ones, like Asiago)isn’t really visible at first-glance. Only reading about the battles can give me the insight needed to portray the war as authentically as I’d like to. This is one of the reasons why map building in general can take so long.
Another concern is mountain passes. My general approach with mountain passes is to leave gaps of hills, forests, and plains within a range of mountain tiles. These routes serve as risky avenues of attack for a player on the offensive: pushing into enemy-controlled mountains puts you at risk of being flanked by mountain tiles occupied by hostile divisions which have a huge defensive advantage against you: you could easily be encircled. But pushing through passes opens the possibility of breaking through your opponent’s defensive setup, and taking the fight to the plains beyond. This is exactly what happened in the Carpathians, where Russia, Romania, and Austria-Hungary fought for control of the passes keeping the Entente out of Transylvania. It’s also typical that mountain passes were hugely important as supply routes, but sadly HoI IV’s supply mechanics don’t really have the fidelity to establish this as a feature (it’s one of the things I’d love to see expanded on in the base game).
So, again, I do some research and map out some of the famous passes in the mountain ranges of the balkans. I wish I could say this was straightforward, but it isn’t: information on mountain passes really isn’t forthcoming, for some reason, and on some occaisions I’ve had to go digging for hours to try and find anyone resembling an authority on this sort of geography (including Serbian tourist guides). The Carpathians, at least, were so involved in the Romanian and Galician fronts that some Wikipedia pages give mention to the main passes used by German and Austrian armies..

Passes here are crudely scribbled out in magenta. I can always pick out the most appropriate route of a pass later by interpreting how a valley runs on the topographic map, so it’s okay to be rough here.
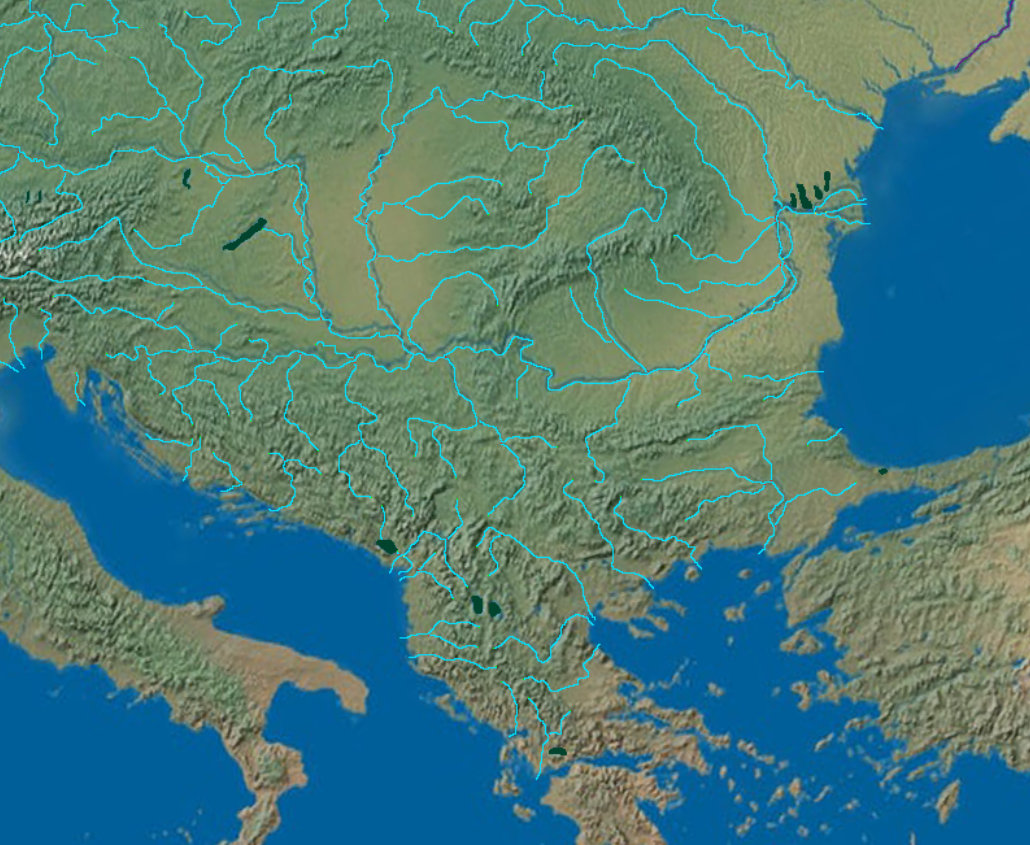
With the most important mountains, forests, and swamps marked out, I can start filling in the terrain map itself. This usually involves a lot of eye-balling, guessing, and googling (‘Important mountain ranges in Slovakia, WWI mountains Serbia, WWI forests carpathians Galicia …”). I also have a growing set of detailed maps including a heightmap, a slopemap, a rendition of European forests in 914 (missing Yugoslavian data, sadly …), a map of European Ramsar sites (protected wetlands, about as close as I can get to a ‘swamp map’), and so much more.


The terrain in game:

It may seem simple, but the result actually has a huge amount of care behind it. This is especially important for the Balkans, I feel, since this region was center-stage both during and immediately before 1914 (with the Balkan Wars): its terrain needs to feel interesting to play on, but also authentic. So I’ve done my best to feature the strategic plains of the Macedonian highlands, the Carpathian and Dinaric passes, and even the individual hills fought over during the opening days of the Serbian offensive.
Victory Points
In HoI IV, a ‘victory point’ is a tile on the map with a name, more or less. It typically represents an important city or town in World War 2. When a country loses enough victory points, it capitulates.
VPs come in different sizes: some represent 25 points, others 100 points, and different map icons are used to suggest these increasingly important objectives. It’s interesting to note than, in vanilla HoI IV, the points on a VP tile are quite arbitrary, and don’t really correlate to anything concrete like the population of the city. Stalingrad, for example, is one of the USSR’s handful of mid-sized VPs (in the same rank as Kiev and Leningrad). Yet Stalingrad was, actually, quite a small and unassuming city. But because it holds such a definitive pedestal in the history of the war, I suppose Paradox saw it fitting that it be marked as an important location. I bring this up to illustrate that VPs have another really important role, they provide flavour to the map. Battles, historically, end up being named after the locations they were fought, so names like Verdun and Ypres carry a lot of thematic weight, giving the player a chance to really feel like they’re playing through the great war, even if these two towns were, in fact, quite small.
For this reason, again, marking VPs takes some research, and isn’t as easy as just looking up the largest cities of Europe in 1914 (which itself is information very hard to come by). So my approach with defining VPs is:
Research a front. Even a skim-read will do. If there was a huge, pivotal battle in Macedonia, then I really want the map to display the town where it happened, even if that town is otherwise small and unassuming.
In places where the fronts never reached, generally add a country’s urban areas from largest to smallest. Try and space VPs out so that every state has one or two, and ensure that VPs are placed in such a way that most coastal states have a few sensible port locations.
Rank VP sizes generally by population, but sometimes by historic fame. My rule of thumb is that cities that were smaller than 50k population in 1915 (again, it can be painfully difficult to get this census data, if at all, and I have to do plenty of guessing based on modern figures) are small VPs, 50k-100k are midsized, and 100k above are large, though this changes from country to country. A select few cities in Europe - the dozen or so largest at the time, are marked as enormous cities, which I’ll pay special attention to when designing their urban layout. This makes room for potentially dramatic battles over the streets of Paris and Berlin.
While I’m at it, start marking down fort cities. Forts are a new terrain type I’ve added to model cities which are in naturally defensible areas, or have historic battlements/derelict forts which (for example in Liege, Verdun, and Premysl) resulted in some of the most well known sieges of the war.

Since this post has, again, spiralled into something much larger than what I’d expected (making maps is hard), I’ll be continuing my progress in a future post. My next steps are to define the key road and rail links of the Balkans (a feature unique to the mod) before finally drawing out the tiles of the map (a mostly mindless task, though it still takes a lot of care).